Looking for a fun and simple way to engage your child in playful learning? Set up a play dough mat!
Play dough is a versatile tool that provides numerous benefits for young children, aside from being a whole lot of fun! One benefit of play dough is that it helps develop a range of fine motor skills. Fine motor skills involve the use of small muscles in the hands, wrists, and fingers which are a building block for activities like writing, drawing, and learning how to tie your shoelaces.
In addition to strengthening your child’s hand and finger muscles, playing with play dough also builds dexterity and improves hand-eye coordination by focusing on these movements:
- Grasping: picking up, holding, and manipulating the play dough with fingers
- Pinching: pinching the play dough between the thumb and index finger
- Rolling: using hands and fingers to roll out the play dough with a tool or rolling the play dough between the palms of the hand (making a snake)
- Cutting: using scissors or other cutting tools to cut the play dough
- Poking and Pressing: poking holes or pressing small objects into the play dough with fingers
What’s not to love, right? So how do you introduce your child to play dough?
It’s easy if you follow these simple steps!
- Prepare a table or other flat surface with a play mat, a heap of play dough (store bought or homemade), some wooden tools, and a few cookie cutters, animal figures, or other loose parts you have around the house (beads, buttons, twigs). When choosing a space for your set-up, make sure its one where your child can easily access the play dough and the tools.
- Invite your child to join you, offer the play dough, and explain what it is and how it can be used.
- Encourage exploration by telling your child he can use his hands and fingers to play with the play dough. You want him to become familiar with the texture and consistency, so let him squish it, poke it, roll it, pinch it, shape it, and mold it in whatever way he likes.
- Once he is comfortable handling the play dough, introduce a few tools, one at a time. Model how to use a rolling pin or a bottle to flatten out the play dough. Show him how to make shapes with a cookie cutter, or offer a wooden knife or a pair of child-friendly scissors to cut the play dough into pieces. This is the time to sit back and see what other techniques your child tries on his own. It’s all about experimentation!
- Finally, set out some small objects (animal figures, beads, buttons, twigs, etc.) and show your child how to press the objects into the play dough. What kinds of patterns and designs can he make?
Build in Scientific Exploration
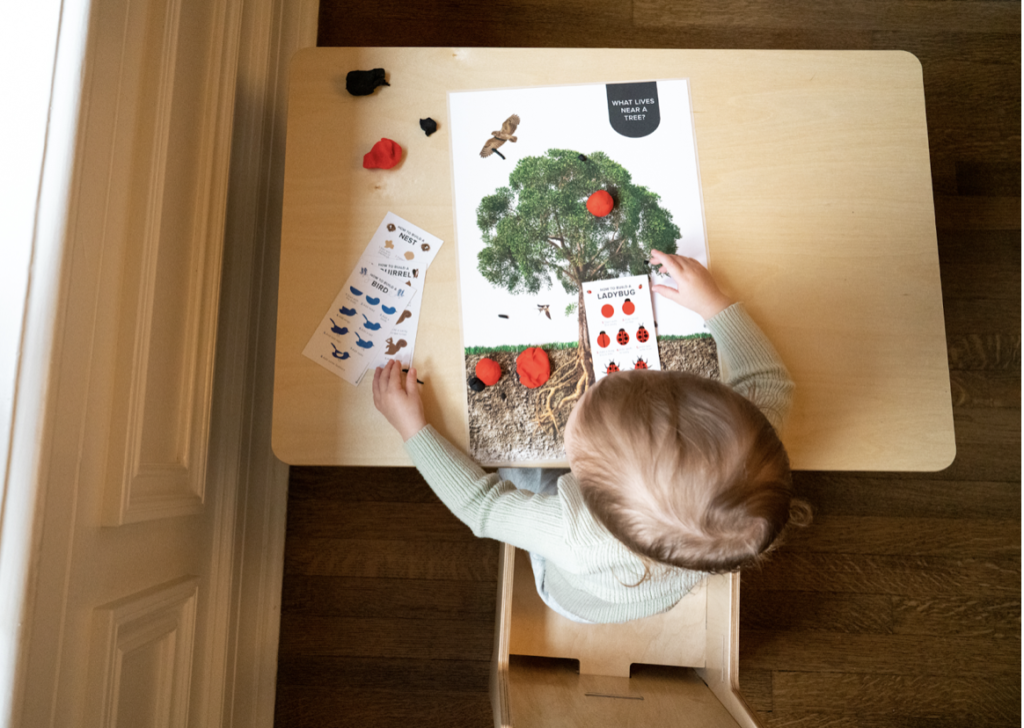
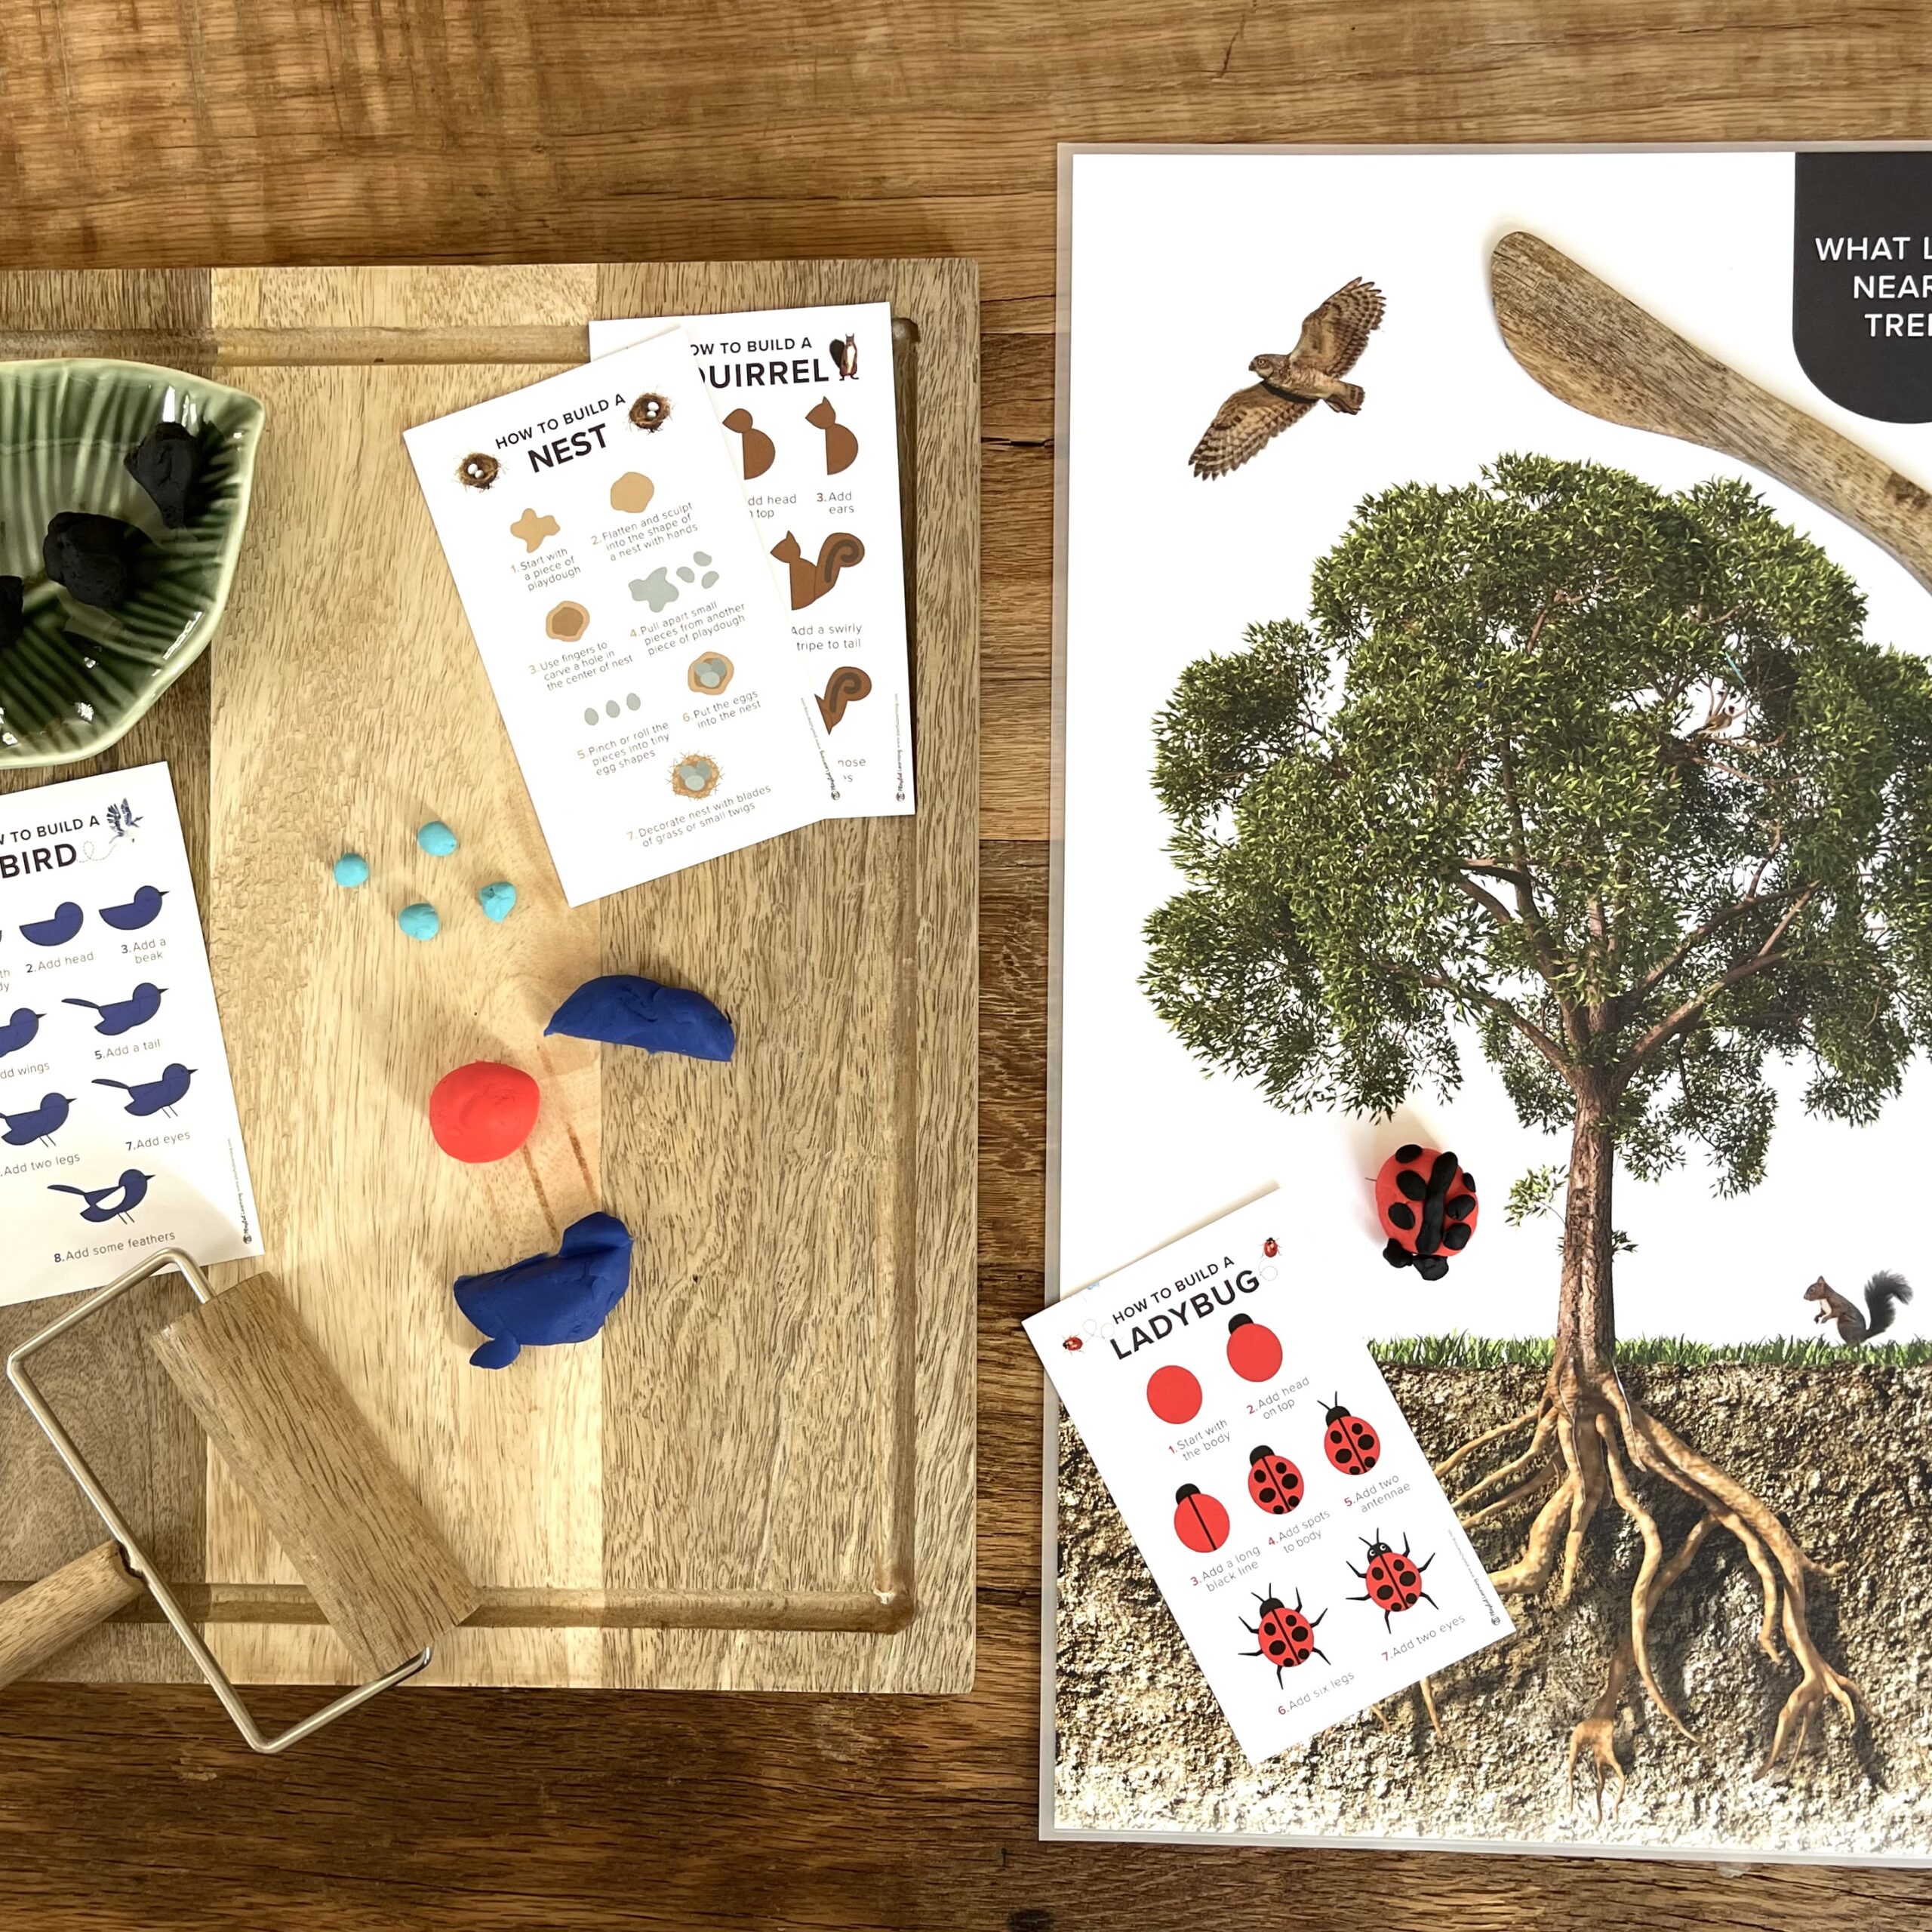
Want to build in some scientific exploration to your play dough experience? After you’ve given your child time to freely explore the play dough, go on an outdoor adventure! Take a walk and observe the trees in your neighborhood. What types of creatures can be found living on, in, or near the trees? If you have a magnifying glass, bring it along so your child can look closely at a tree’s trunk, on the underside of its leaves, or dig in the dirt below it.
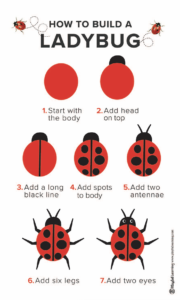
Once inside, print out our How to Build a Ladybug Maker Card, offer the play dough, and tell stories about the animals you observed. Get playful with your creations!
If you’re an online member, you can see the full lesson here or just print out the What Lives in a Tree Play Mat and all four of our Maker Cards. For our Do-It-Together Kit subscribers, this laminated play mat and set of cards is included inside your All About Trees box.
Resources and Inspiration (members only):
Do-It-Together Experiences: All About Trees
Trees Thematic Exploration